
Thursday, February 26, 2015
Tuesday, February 24, 2015
GIMP Tools
Here are my screenshots of using each tool in GIMP specified in the lecture notes.
Selection Tools:


 Here I have used some selection tools and filled them with color.
Stroke:


 Here I used stroke to color the outline of these shapes, and then pasted it into another one of the pictures I have previously worked with in gimp. Below is the stroke.png
 Paste Into:
 Here I have taken the same image and pasted it into pictures, two as shown in the last section also.
Below is the pasteinto.png
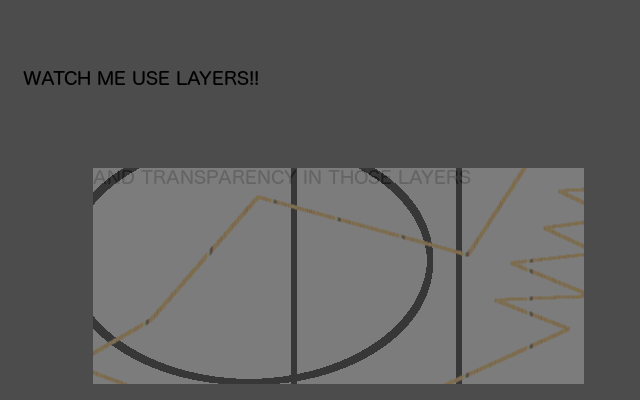
 Transparency:


 Here I have made a few layers, as seen on the right, which are transparent.
Below is the transparency.png
Text:


Here I am using layers, and transparent text in each layer!
Below is the text.png

Scale:


 I used the scale feature on a previous midterm, however when I clicked "Save a Copy" the .png extension was unavailable, the same is true when I save anything in gimp, I have to export it instead for it to work, but there is no option to export a copy. I don't want to mess up the files with my midterms, so here are also some screenshots of the "Save a Copy" window with the minimal options I saw, I hope this is ok, and I hope you guys like it!
Selection Tools:
Stroke:
Below is the pasteinto.png
Below is the transparency.png
Text:
Here I am using layers, and transparent text in each layer!
Below is the text.png
Scale:
Tuesday, February 17, 2015
Class 6, Assignment 9
There was a lot of interesting stuff in this article that was posted in the lecture notes, it focuses on a theory that say people change with the technology and culture around them, as well as a theory that claims the next big technological breakthrough is the expanded use of virtual worlds and that they will affect us in a huge way.
There was a ton of information in this reading but some things that stuck out to me in particular were the areas about cloning or multiplying the self. It talks about basically translating human mentality and emotion into computer code, which would then give the option to easily duplicate or clone humans, more or less just as easy as copy/paste. This was a little much for me! That is a hard theory to grasp, but I suppose the same thing was being said at one point in time about putting a man on the moon, so we'll have to just wait and see!


There was a ton of information in this reading but some things that stuck out to me in particular were the areas about cloning or multiplying the self. It talks about basically translating human mentality and emotion into computer code, which would then give the option to easily duplicate or clone humans, more or less just as easy as copy/paste. This was a little much for me! That is a hard theory to grasp, but I suppose the same thing was being said at one point in time about putting a man on the moon, so we'll have to just wait and see!
Class 6, Assignment 8
WebGL, to me is the most interesting thing I have seen so far this semester. The games were actually a lot of fun to play! Everything I did can be found at http://JiED.org and https://playcanvas.com!!
Here's what I did.


 The first thing I clicked from http://JiED.org was the rubik's cube, which brought me to a functioning virtual rubik's cube! There are simple instructions, but I'm sure I could not even begin to imagine what is happening here to make this possible. I also am terrible at rubik's cubes, so as we can see I messed it up pretty badly within a few motions.
 Next were the games on https://playcanvas.com which were so cool that it gave me the "is this really for class?" feeling because they were awesome. First was this little tank game where I had to drive around using the arrow keys and kill enemies by shooting (click).
 After that I played a game with this freaky looking dude. I couldn't figure too much out in this game, the camera just kept spinning around him in circles, but the graphics were very detailed.
 The last game was my favorite, called "zombie pac-man" and it was exactly that. I was not ready for this when I began playing, you are a little guy on a pacman board and instead of little colorful things attacking you it was zombies! As well as being much faster paced. The biggest shock was having my computer speakers plugged in (mistake) because when a zombie finally catches you, a blood curdling scream comes thru the speakers... that one woke me up for sure LOL!
 Last screenshot is me creating my account on https://playcanvas.com
Here's what I did.
Class 6, Assignment 7
Here are my 4 graphics I created on Canvas
 It was tough at first to find things to use that I didn't have to pay for, here is a layout advertising a steak night, to which I added "Come get some steak!!!"


Next was a template for a facebook cover photo, to which I added some funny motivational text.
Next was a valentine's day card. I hope everyone was on a real date and not one in a virtual world (although some avatars are pretty good lookin'........lol)
Last is a shoutout to follow us on twitter!!
As for the questions:
1. Canvas is a website to create images that correspond with things we use in everyday life. For example there are templates for facebook, instagram and twitter posts which all fit perfectly when transferred to the respective website. As Prof. Walsh noted in one of our classes, people are more likely to notice and respond positively to a social network post that contains an image. Things like Canvas can be used to help market via social networks.
2. I would say that Canvas is mostly a vector graphics tool, because pretty much anything you add to the graphic you are working on can be resized and moved easily, meaning most of the stuff is a vector graphic because you cannot do that with a bitmap graphic.
3. Canvas is similar to piktochart because both are used to create an image or poster that will be used elsewhere, and both do so by using vector graphics.
4. Canvas and piktochart are different because canvas has more specific templates like what I mentioned in question 1, which are based on popular social networks.
Class 6, Assignment 6
I logged on to http://www.exquisiteforest.com and made an account to begin adding detail to the forest. However, the website is no longer accepting new animations on any parts of the "forest" and prompted me with the following message for every part I tried to add to (I tried at least 10).

Class 6, Assignment 4
Here is a screenshot of my process of adding everyone's blog to my sidebar on my blogger, followed by a screenshot of my actual finished sidebar.


Midterm #8
Here is my attempt to make myself beautiful... kidding, I used the smudge tool to lighten up underneath my eyes a little bit, but had to hold off because too much looks weird. Then I used the blur tool on my nose and that is pretty much it, too much else made it look un natural.
Here is the original photo, followed by a process screenshot

 Finally, here is my edited photo, pay specific attention under my eyes, that's where most of my work is and I think it looks a little better.
 This is using GIMP tools to edit a photo of myself and make it look better. It is a midterm (or final, if it's a final) exercise from the Immersive Education course that I am taking at Boston College. The course is called Discovering Computer Graphics. For details, visit the immersive BC portal at http://ImmersiveEducation.org/@/bc
Here is the original photo, followed by a process screenshot
Midterm #7
Here are my process screenshots of midterm 7, where I took a photo of my future wife, Blake Lively and added all the stuff noted in the midterm exercise.


Lastly is my finished product, I have two copies saved, one is a .psd and the other is a .jpg
The .psd would not upload to blogger, but below is the finished .jpg image.
 This is me using GIMP to edit and add layers to a photo of Blake Lively. It is a midterm (or final, if it's a final) exercise from the Immersive Education course that I am taking at Boston College. The course is called Discovering Computer Graphics. For details, visit the immersive BC portal at http://ImmersiveEducation.org/@/bc
The .psd would not upload to blogger, but below is the finished .jpg image.
Subscribe to:
Comments (Atom)